
Guide · PPF pattern making
How to make custom PPF patterns
Measure the real panel, turn that curved surface into a flat shape the film can follow, set the seams, wraps and cutouts, then prove it with a test fit before production film. That is every custom PPF pattern. Below: the five ways installers make their own patterns and templates, the eight steps that matter whichever you pick, and the mistakes that waste film.
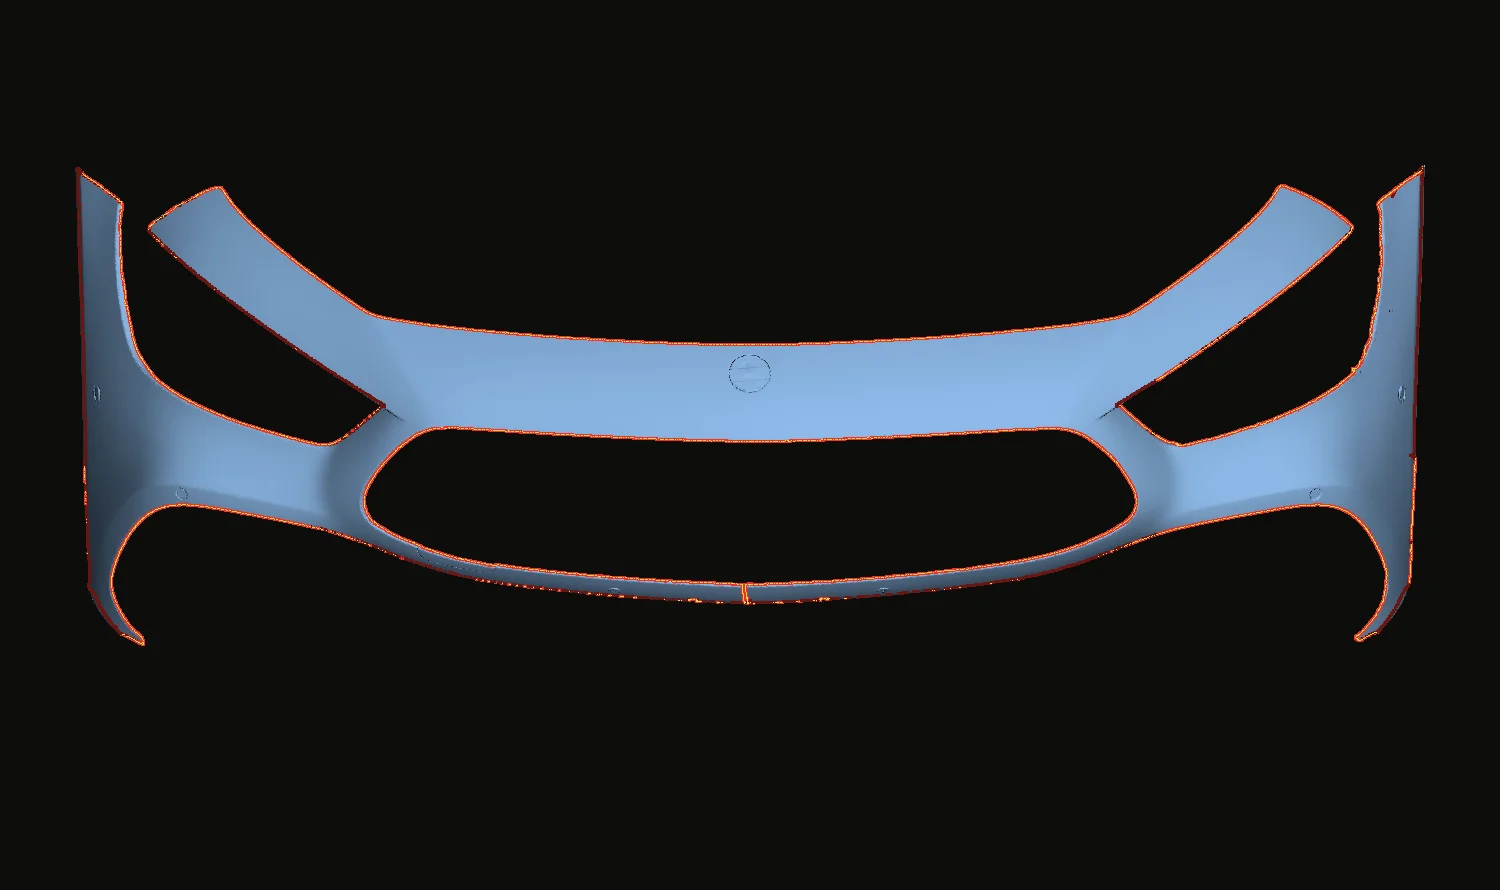
01Measured
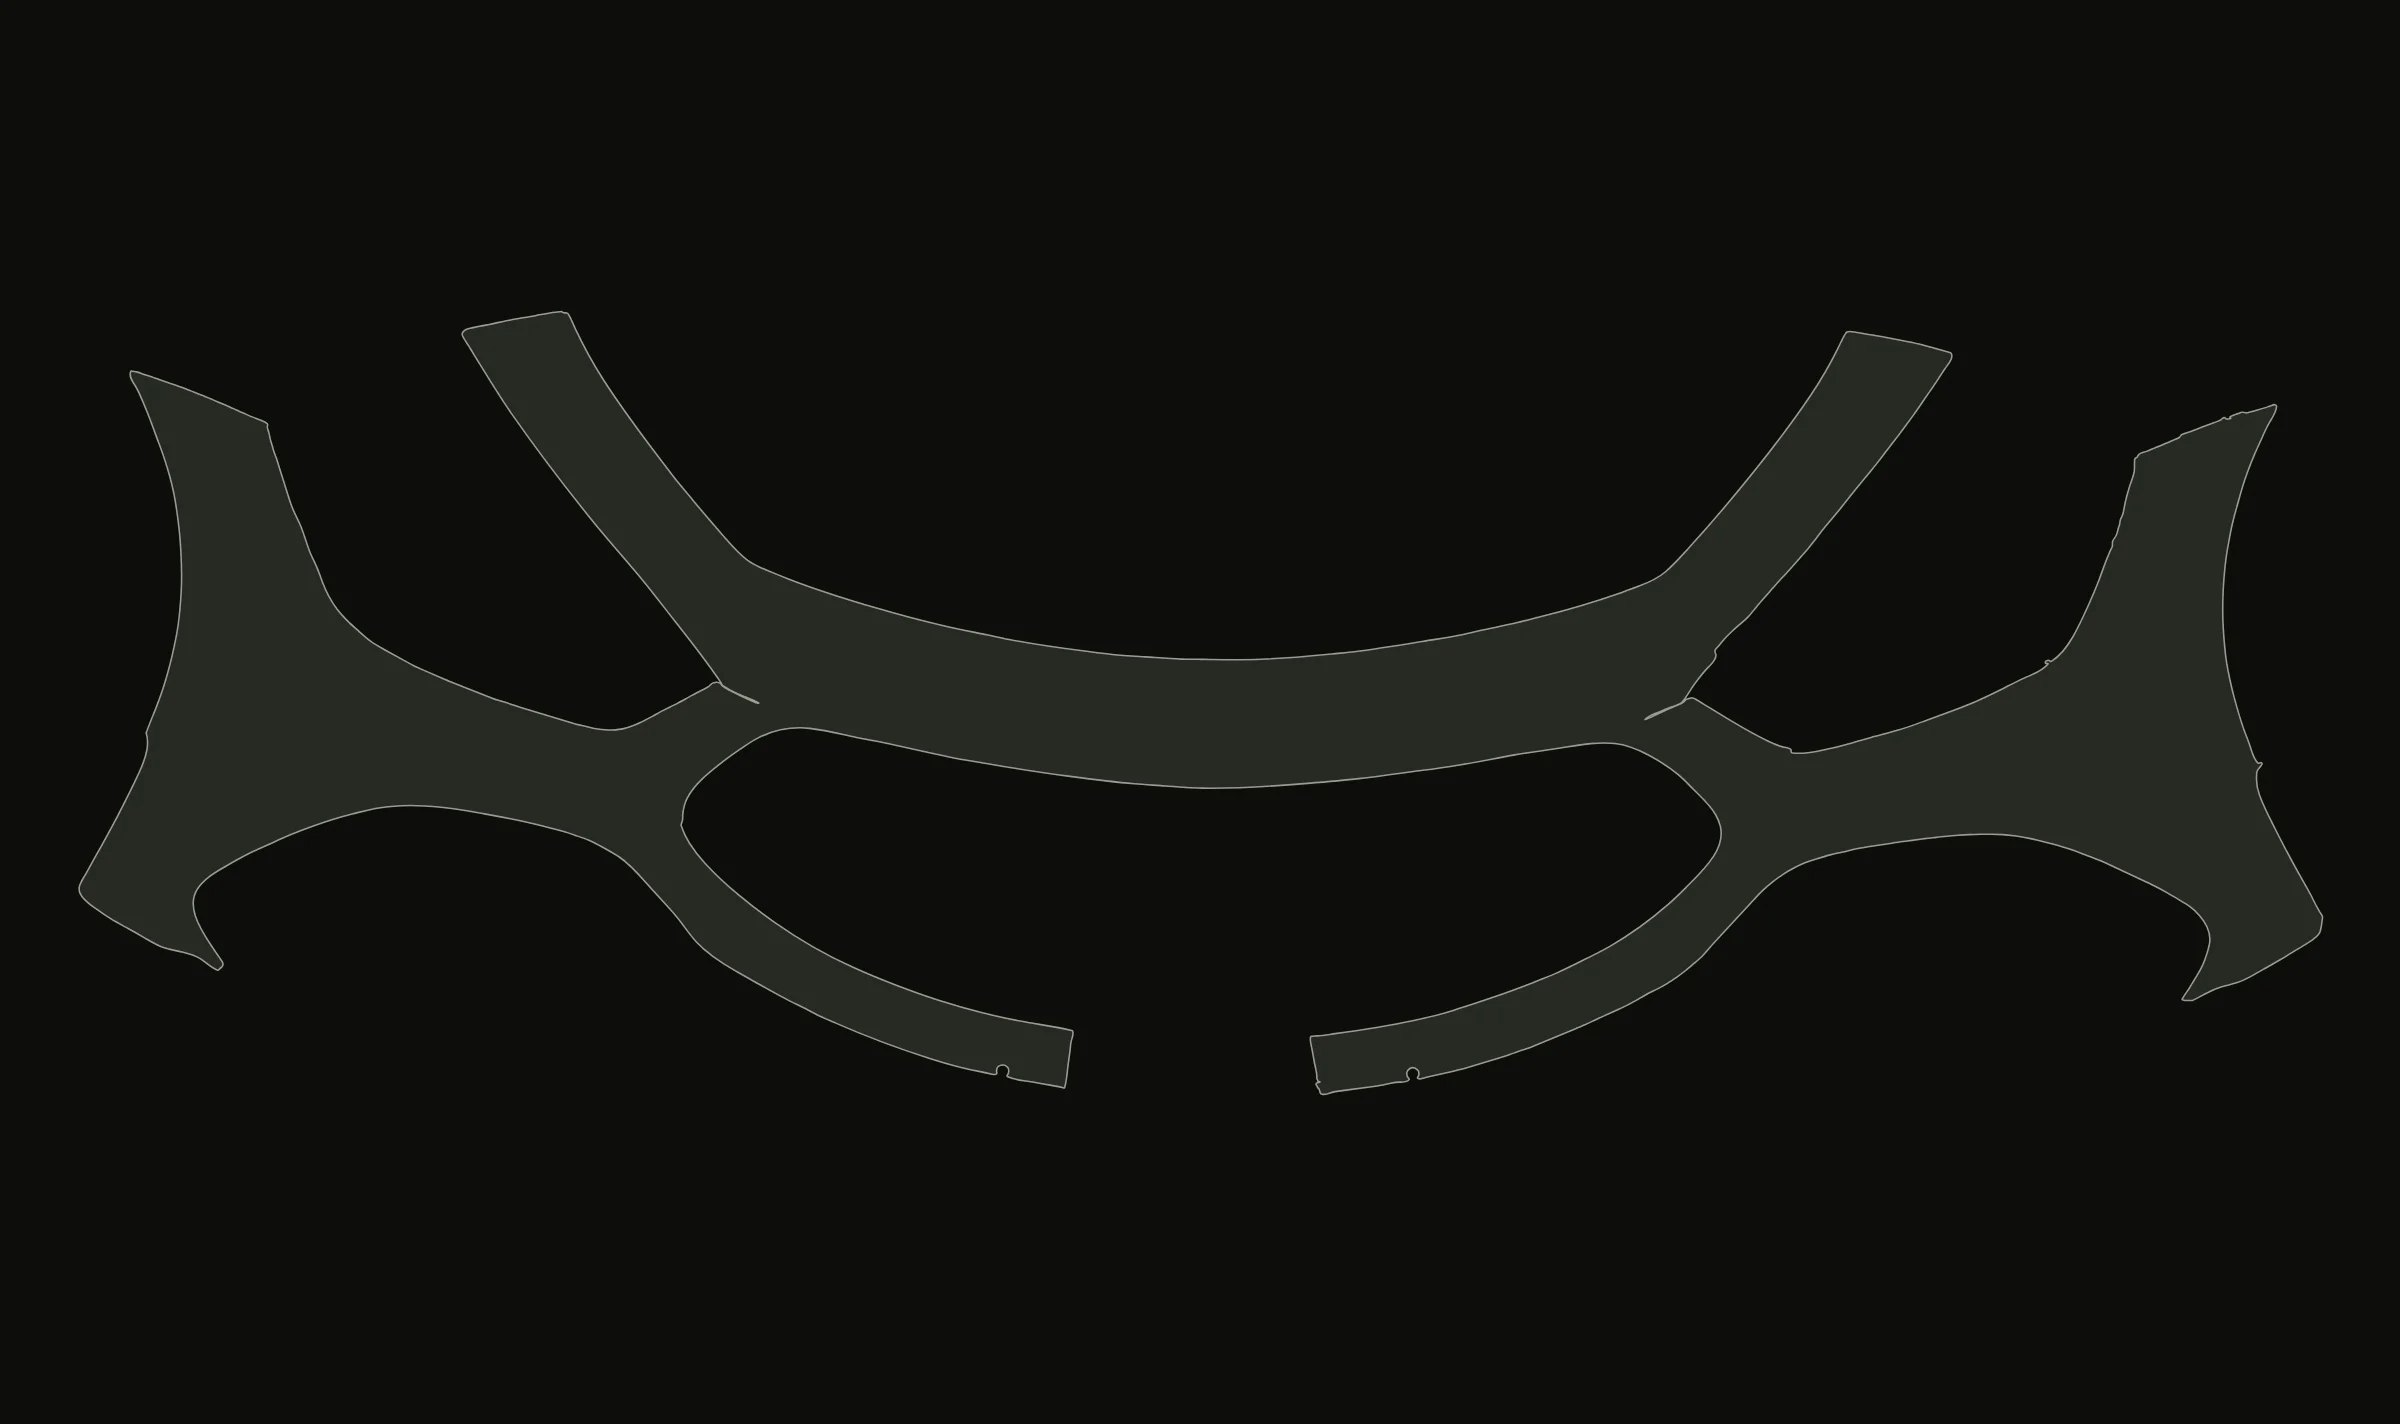
02Flattened
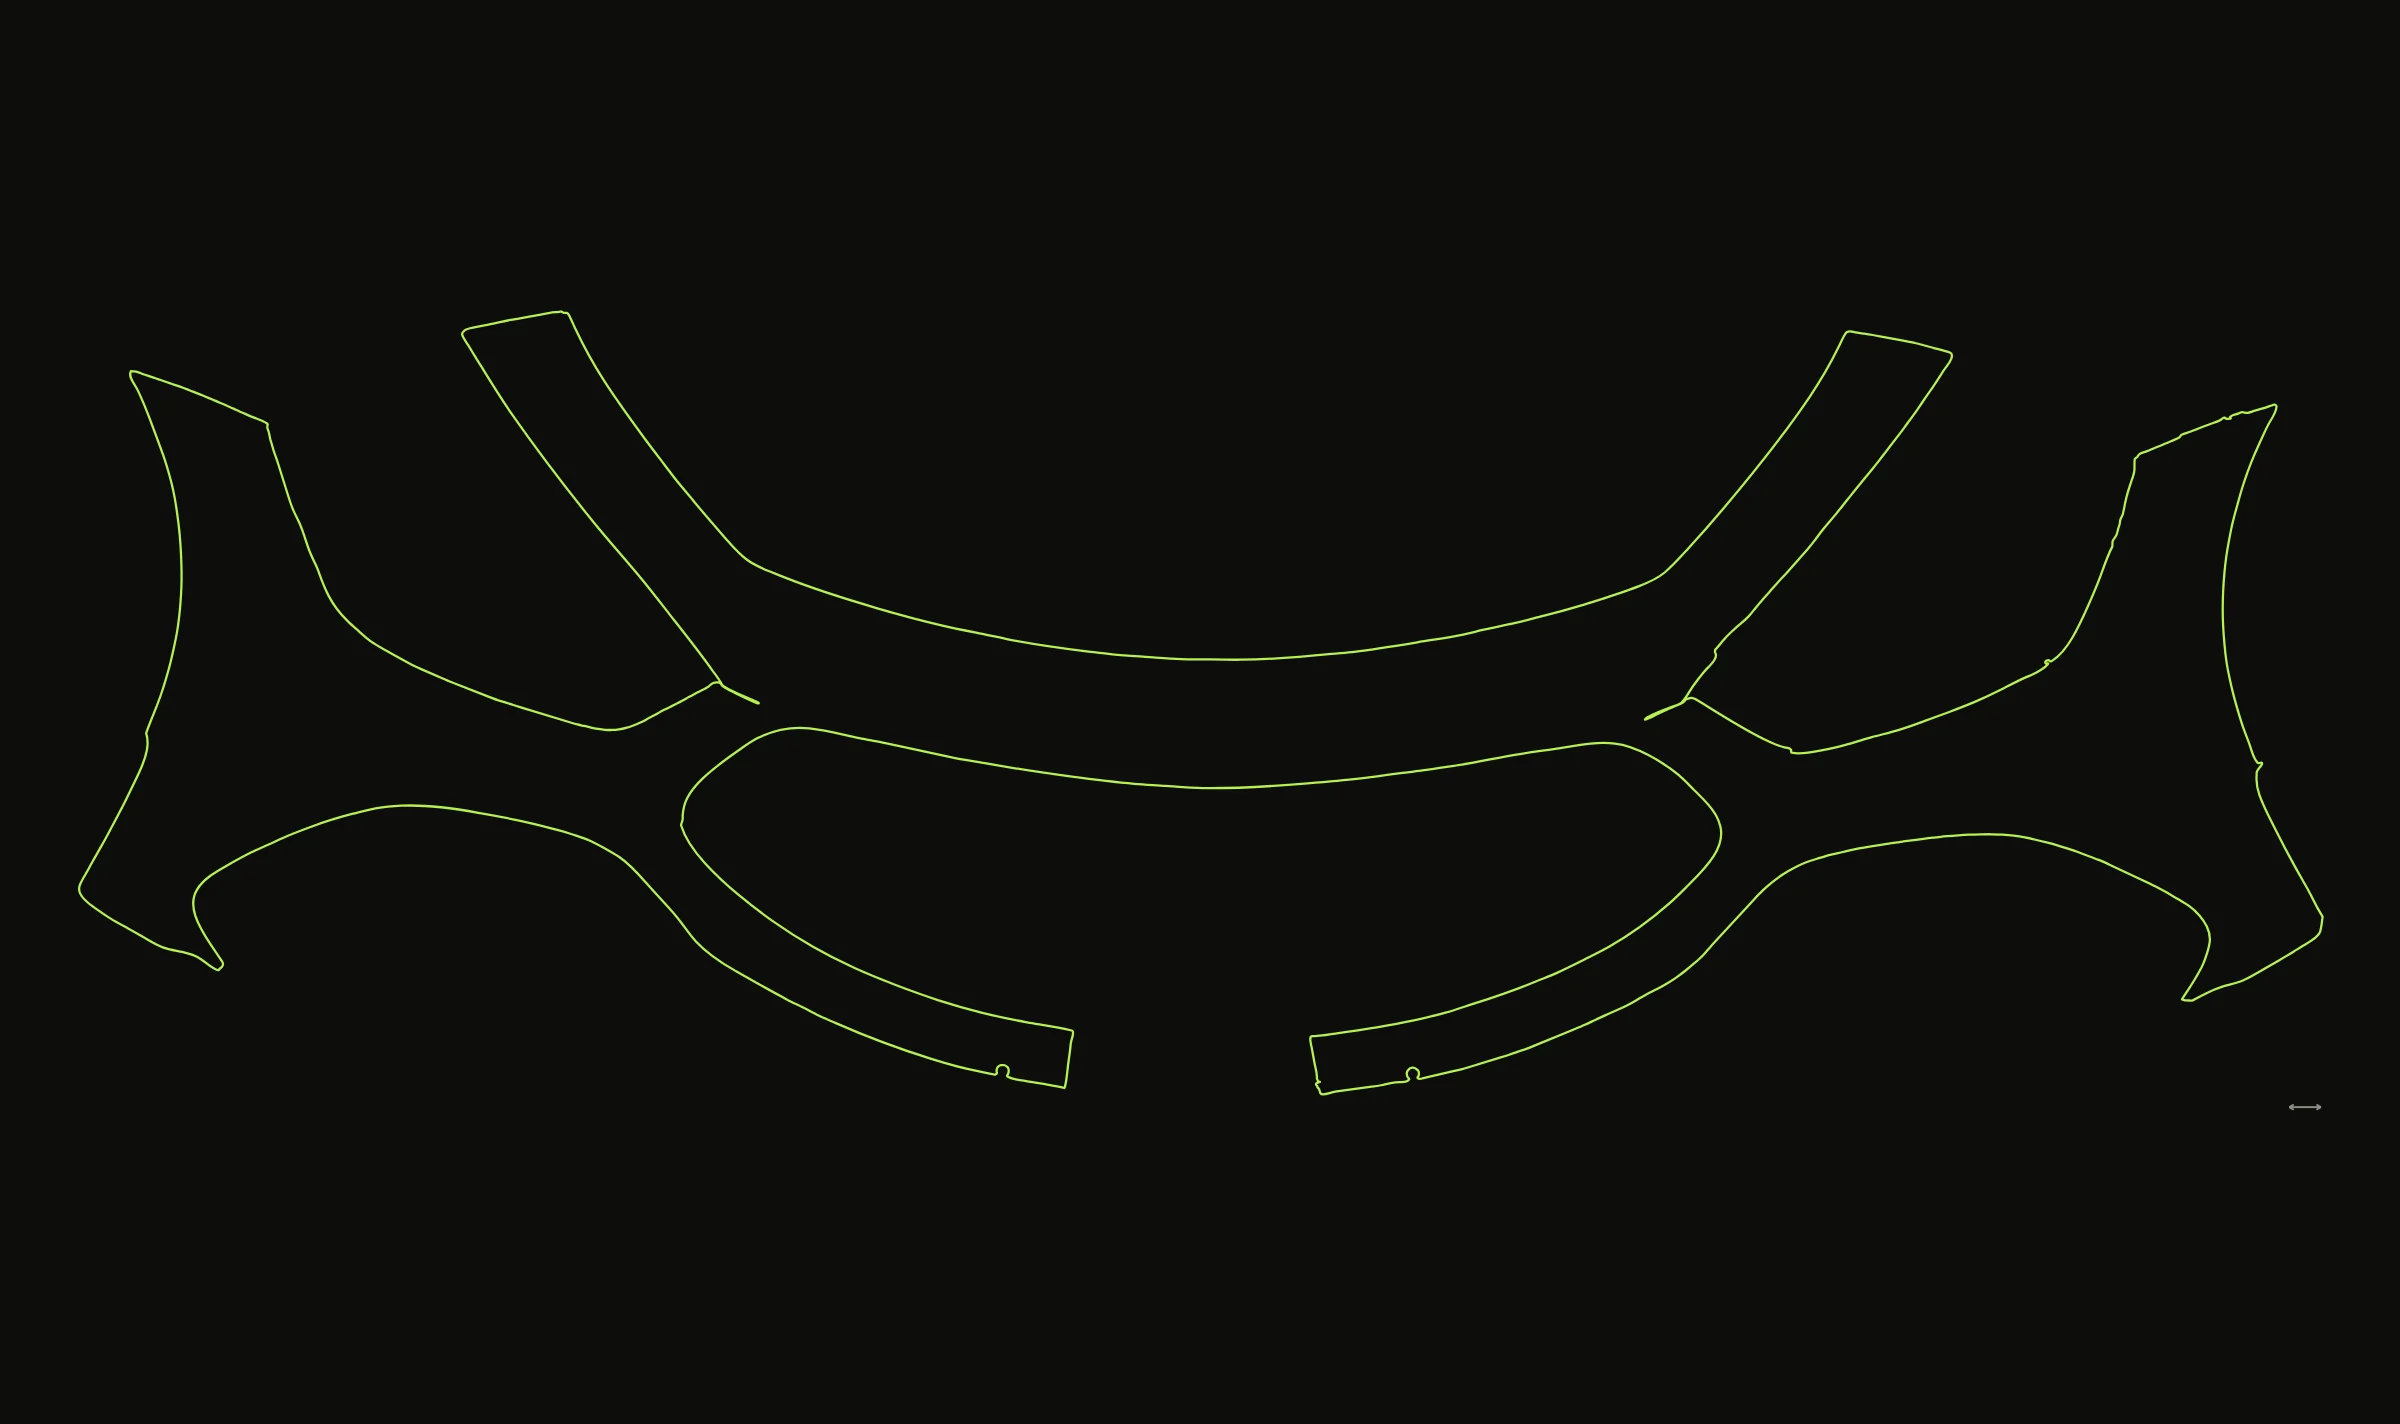
03Cut file
The basics
A pattern is a set of decisions, not a picture of the panel.
A PPF pattern, or template (installers use both words for the same thing), is the full-scale flat shape your cutter cuts, so the film lands on the panel without a blade anywhere near the paint. Getting the outline of the panel is the easy part. The pattern also carries every decision about the install:
- Coverage
- Where the film starts and stops, and how far it reaches onto the next panel.
- Seams
- Where one piece ends and the next begins, ideally on a body line nobody looks at.
- Edge wraps
- How many millimetres of film turn around each edge, and which edges stop flush.
- Relief cuts
- Short slits from the edge that let the film turn a tight corner instead of folding.
- Cutouts
- Parking sensors, washer jets, badges and bolt heads, each with a margin around it.
- Stretch
- On a curved panel, the flat shape has to allow for how the film is pulled into place.
That last one is why pattern making is hard. Most car panels curve in two directions at once, like the skin of an orange, and a flat sheet cannot cover a surface like that without stretching somewhere. A good pattern puts the stretch where the film can take it and splits the panel where it cannot.
Methods
Five ways to make your own PPF pattern.
They differ in one thing above all: whether they measure the curve or only the outline. Bulk film trimmed on the car needs no pattern at all, but it leaves you nothing to reuse.
- 01
Edit a pattern from your library
- How it works
- Open the closest pattern in your cutting software and change it: extend edges for wraps, remove a badge cutout, split or merge pieces.
- Good for
- Cars the library already covers, when you want more wrap or different coverage.
- Where it falls down
- Panels that are not in the library at all: a new model, a facelift, a plug-in variant, an aftermarket part. If the base pattern is off, editing it blind rarely tells you why. Depending on the service, your edits may only live inside its subscription.
- 02
Order a custom pattern
- How it works
- Send photos, measurements or a scan to a pattern service and wait for the file.
- Good for
- Shops that would rather not make patterns themselves and can book the car around the wait.
- Where it falls down
- The car is usually in your bay now, and the wait is measured in days. Whether you can edit or keep the file depends on the service, so changing the coverage often means asking again.
- 03
Lift a tape template and trace it
- How it works
- Cover the panel in masking tape or template film, draw the edges, openings and seam lines on it, peel it off and lay it flat. Then photograph or scan it next to a ruler and trace it in Illustrator, CorelDRAW or Inkscape.
- Good for
- Small, gently curved parts such as pillar trims, when there is no scanner in the shop.
- Where it falls down
- On a curve that bends two ways, the tape has to wrinkle or stretch to lie on the panel, and again to lie flat. The shape changes twice and nothing tells you by how much. Camera distortion and scaling by eye add to it.
- 04
Photograph the panel and trace it
- How it works
- Shoot the panel square-on with a scale in the frame, set the scale in a vector program and trace the outline.
- Good for
- Flat or nearly flat parts such as sill plates and B-pillar trims.
- Where it falls down
- A photo is a projection. Anything that curves away from the camera comes out shorter than it really is, and you find out on the car.
- 05
Scan the panel in 3D and flatten it
- How it works
- Capture the panel with a 3D scanner, clean the mesh, mark coverage and seams on the surface, and let flattening software compute the flat shape and show where it stretches. Then edit, export and test fit.
- Good for
- New models, rare and modified cars, aftermarket parts, deep curves, and any pattern you will cut more than once.
- Where it falls down
- You need a scanner and software, and some practice with both. Dark, glossy paint is the hardest surface for most handheld scanners. And a scan does not remove the test fit.
The five methods at a glance
| Method | Measures the curve | A file you can keep and edit | What you need | Best for |
|---|---|---|---|---|
| Edit a library pattern | No, it inherits the base pattern | Depends on the service | A pattern subscription | Small changes to cars the library covers |
| Order a custom pattern | Only if they scan it | Depends on the service | Photos or a scan, and time | Shops that do not want to make patterns |
| Tape lift and trace | Roughly, and the tape distorts | Yes | Tape, marker, camera, vector software | Small, gently curved parts |
| Photo and trace | No | Yes | Camera, scale, vector software | Flat parts |
| 3D scan and flatten | Yes, with the stretch shown | Yes | 3D scanner, flattening software | New, rare, modified and aftermarket panels |
Step by step
How to make a custom PPF pattern in eight steps.
The steps hold whichever method you use. Where the methods differ, the scan route is noted, since it is the one that measures the curve.
- 01
Decide the coverage before you measure
Write down the panel, the coverage and where every edge stops: flush, wrapped, or onto the next panel. Coverage decides what you measure, where the seams go and how much film the job takes. Changing it after the pattern is drawn usually means starting over, unless you kept the measurement (step 08).
- 02
Measure the car in front of you
Not the brochure car and not last year’s model. Facelifts, trim levels and plug-in variants move sensors, badges and openings, which is usually why the library pattern did not fit in the first place. Clean and dry the panel first. If you scan, capture a little past the coverage so the edges are real geometry, not ragged scan fringe, and check your scanner’s settings for dark, glossy paint before the car arrives.
- 03
Get it flat, and see what flattening costs
This is the step that separates a pattern that fits from one that almost fits. A tape lift or a photo gives you a flat shape with no record of how much it was distorted on the way. Flattening software computes the flat shape from the measured surface and shows, area by area, where the film will be stretched or compressed. Check that against what your film can take before you cut anything.
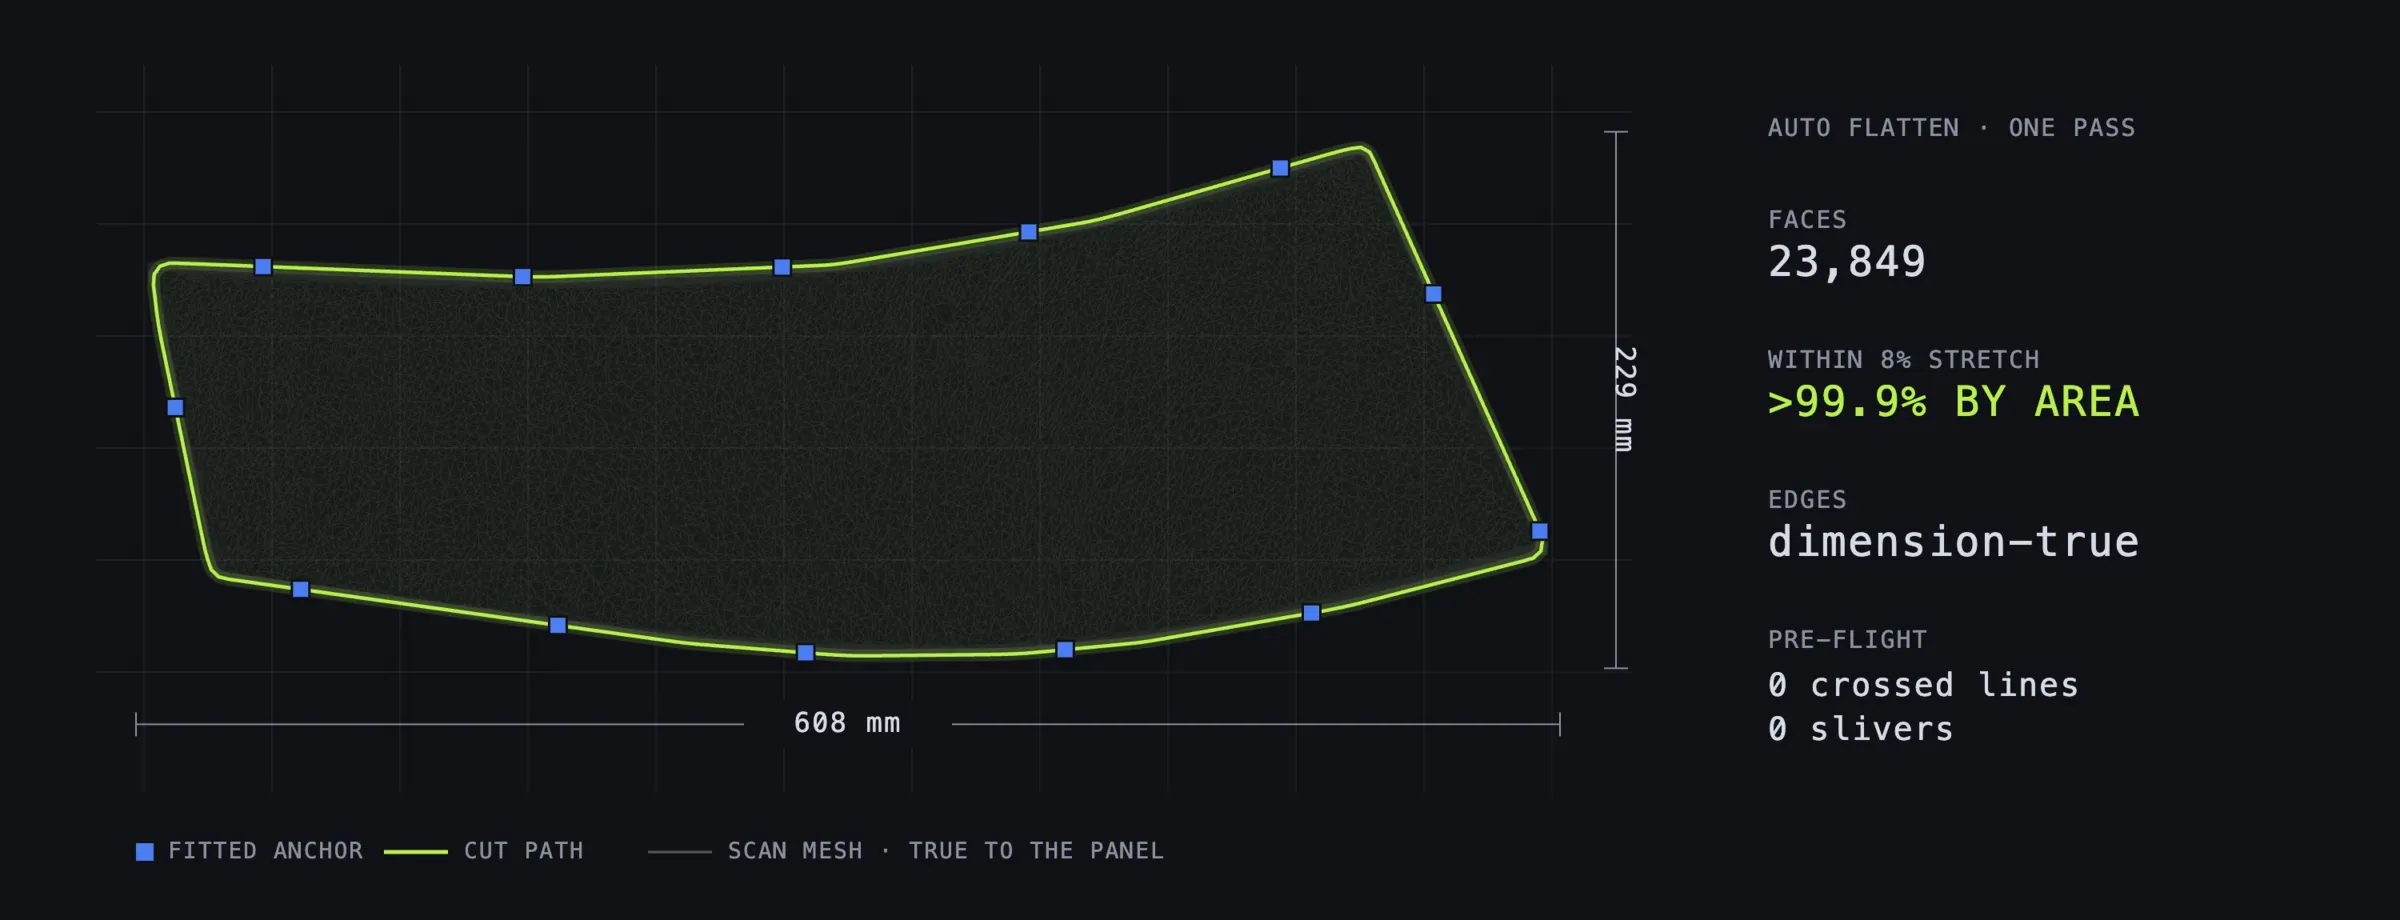
A Volvo FH trim after flattening: 23,849 scan faces, 608 × 229 mm, more than 99.9% of its area within 8% stretch, and a cut path you can still drag by its anchors. - 04
Put seams and relief cuts where the film needs them
Where the stretch runs past the film’s limit you have two tools. A seam splits the panel into pieces that each lie flat; put it on a body line or under a trim edge, where it disappears. A relief cut is a short slit from the edge that lets the film turn a tight corner instead of folding. The RAM 1500 fender flare needed five relief notches where it turns hardest, and still went on as one piece, 1485 × 435 mm.
- 05
Set the edge wrap, edge by edge
Wrapped edges are what customers notice. Film that stops short shows a line; film that turns around the edge disappears. Not every edge can take a wrap, though, and too much wrap on a tight edge just lifts. Decide it per edge, in millimetres, and add relief cuts where a wrap meets a corner. The BMW X3 30e charging cap below got three versions of the same outline.
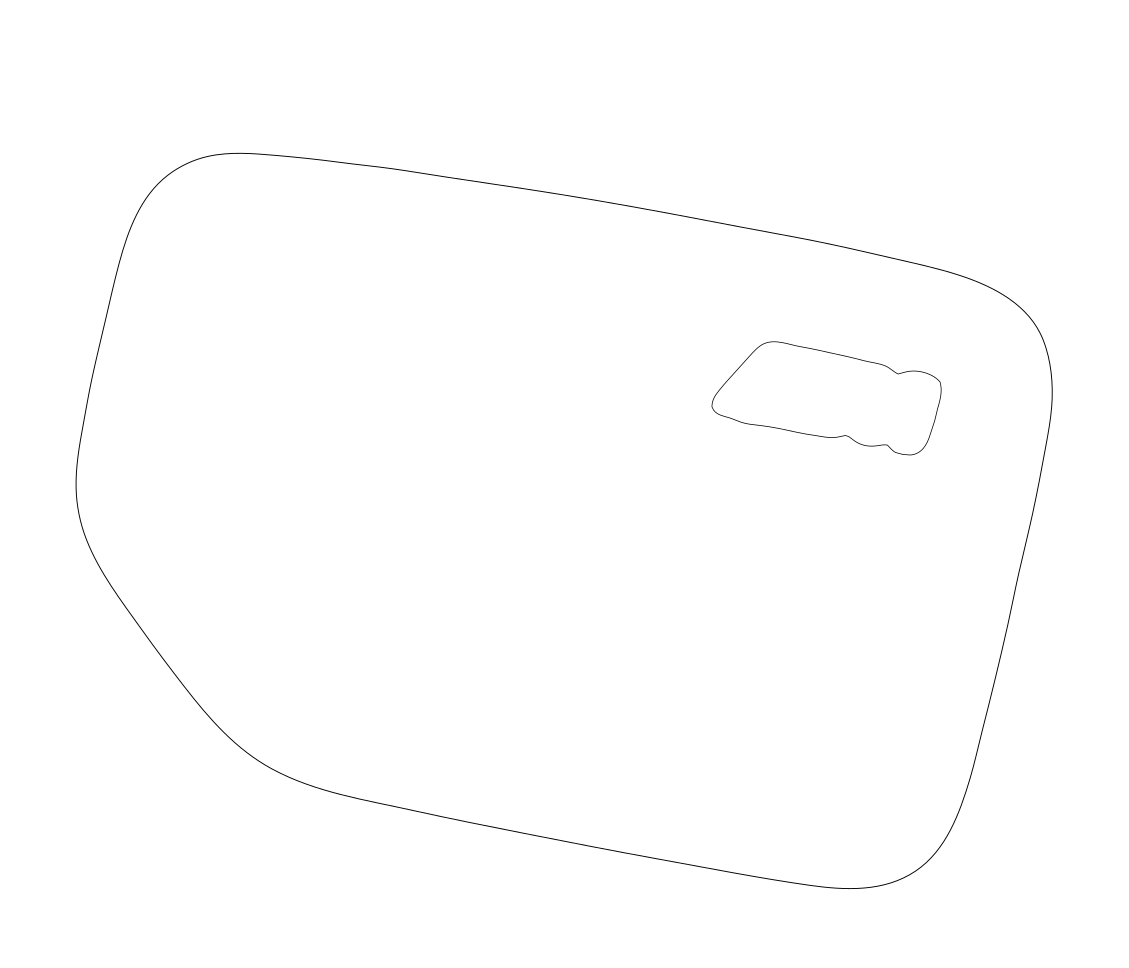
Flush edges
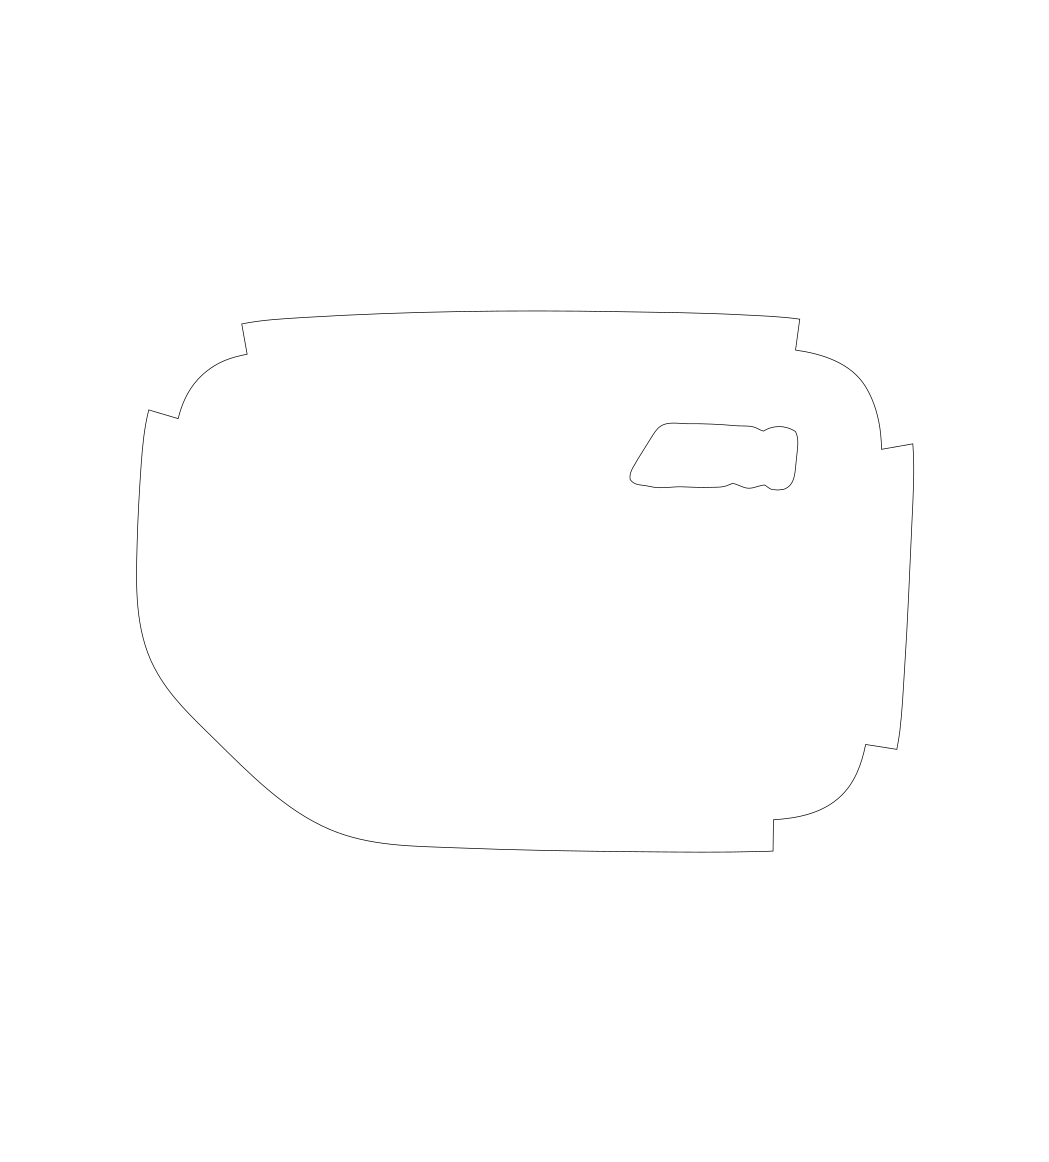
Flush and wrapped edges
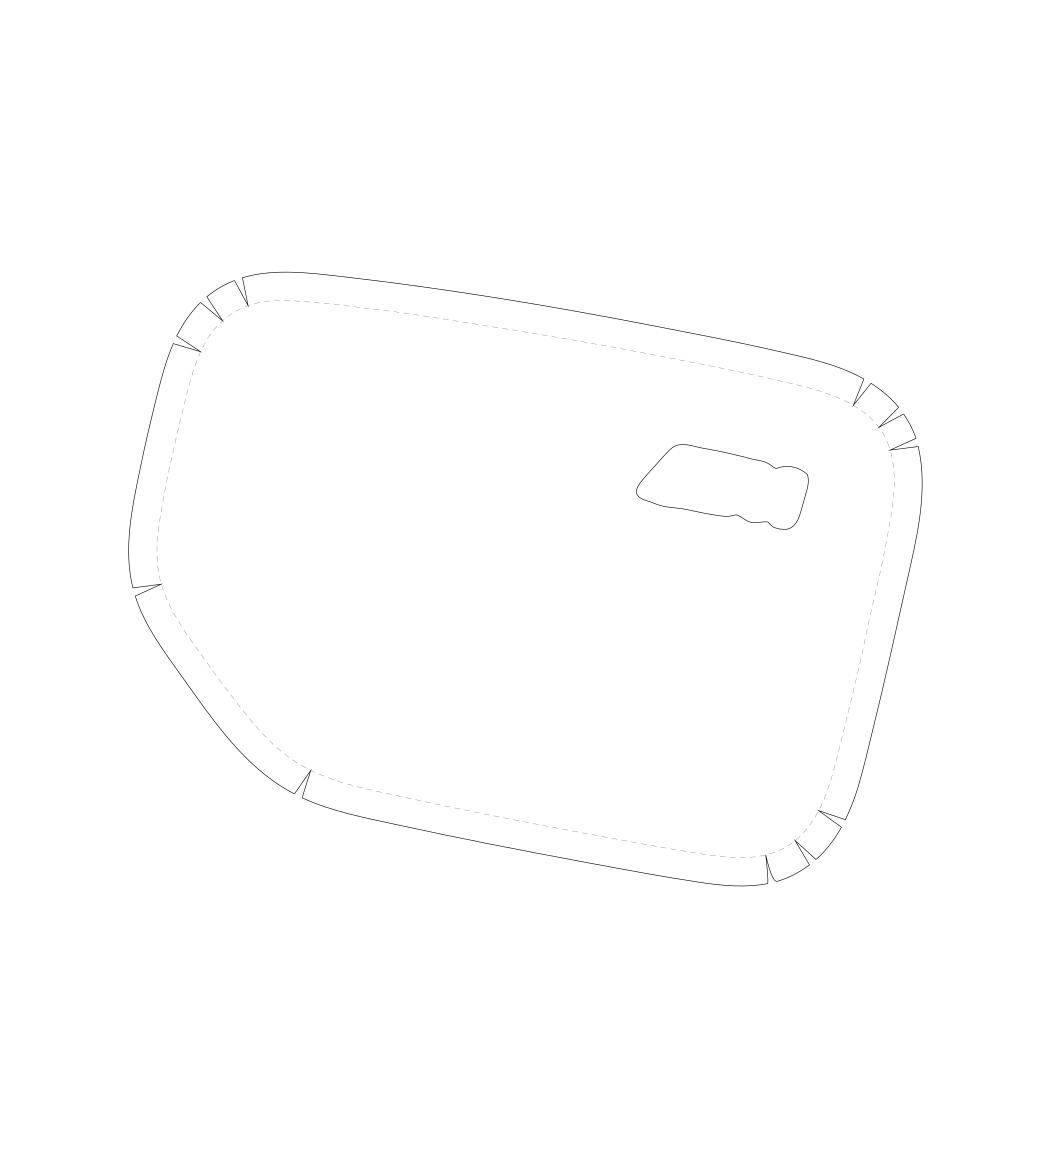
Wrap with relief cuts
One cap, three edge treatments, each with an opening around the badge. Dashed lines show where the film folds. - 06
Measure the cutouts, don’t eyeball them
Parking sensors, washer jets, badges and bolt heads need openings with an even margin, so measure the feature and then offset the cut. On the RAM flare the first draft used a 38 mm circle for every bolt pocket. The second traced each pocket lip off the scan and offset it 3 mm, because no two of the nine pockets were the same shape. Below, a parking sensor on a Range Rover rear bumper, measured at Ø 26.5 mm off its bezel and cut with a 2 mm margin.
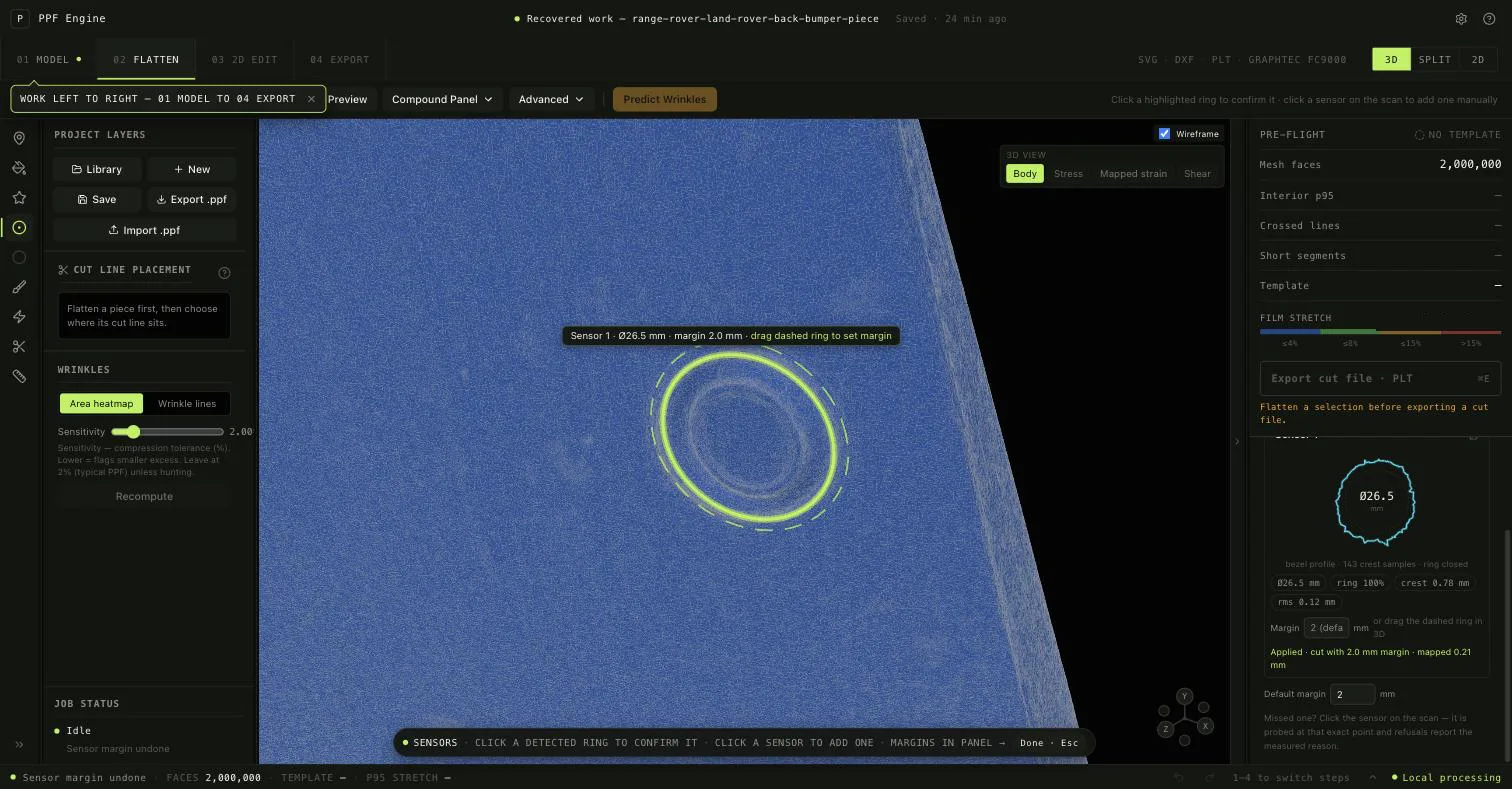
The solid ring is the measured bezel; the dashed ring is the actual cut, set by dragging it. - 07
Clean the cut path and export at full scale
A cutter cuts exactly what it is given. Smooth the outline, remove tiny segments and crossed lines, close every path, and export full scale in millimetres as SVG, DXF or PLT, whichever your cutting software opens. Put a 100 mm reference line in the file and measure it on the first cut: an SVG saved in pixels can import at the wrong size, and you want to find that out on paper, not on film.
- 08
Test fit, correct the file, then cut film
Cut the pattern from paper or cheap vinyl first, or a scrap of film, and fit it on the panel. Check the edges, the wraps, the cutouts and where the seams land. Correct the digital pattern, not just the test piece, then cut production film. Save the corrected version with the vehicle, year, panel and version in its name, and keep the measurement with it, so you can change the coverage later without measuring again.
Mistakes
Eight mistakes that waste film.
Most bad patterns are not drawn wrong. They are measured wrong, scaled wrong or never checked on the car.
Tracing a photo of a curved panel
It comes out short wherever the panel curves away from the camera.
Trusting the tape to lie flat
A tape lift off a curve that bends two ways is already distorted before you photograph it.
Scaling by eye
Export in millimetres with a reference line, and measure the first cut before you trust the file.
Skipping the test fit
Every method, scanning included, gets checked on the car before production film comes off the roll.
Leaving the edges undecided
An edge nobody set to flush or wrap ends up wherever the outline happened to land.
Patterning from the wrong variant
Check sensors, badges and openings on the actual car. The model name is not enough.
Stretching the film to rescue a short pattern
Film pulled past its limit tends to lift at the edges later. Fix the pattern instead.
Saving only the cut file
Keep the measurement too. Without it, every change of coverage starts from zero.
Where we come in
We built PPF Engine for method 05.
PPF Engine is desktop software for PPF installers that runs the scan route end to end. Import an STL, OBJ or PLY scan, set coverage and seams on the 3D panel, flatten it with the stretch shown, add wraps, relief cuts and measured cutouts, and export SVG, DXF or PLT. Your scans and patterns stay on your computer.
It runs in our own studio, where the patterns on this page were made. It is not released for download yet: presale access begins at delivery, estimated December 2026.
- Case study RAM 1500 bolt-on fender flare An aftermarket flare no pattern library had. One piece, 1485 × 435 mm, five relief notches, nine measured bolt cutouts.
- Case study BMW X3 30e fender and charging cap A plug-in variant the libraries missed. Three edge treatments for one cap, each with a badge opening.
Going deeper: how a 3D scan becomes a PPF pattern, which scanners and plotters work and PPF Engine vs ExactFlat.
Refundable in full until your access begins. One email, no questions.
FAQ
Questions about making PPF patterns.
Is a PPF pattern the same as a PPF template?
In practice, yes. Installers use both words for the full-scale cut file for one panel or a whole kit. Some shops say template for a single piece and pattern for a vehicle kit, but the work to make them is the same.
What software do I need to make PPF patterns?
To trace a tape lift or a photo: a vector editor such as Illustrator, CorelDRAW or Inkscape, plus the software that drives your cutter. To make patterns from a 3D scan you also need flattening software: a general CAD flattening tool such as ExactFlat, which runs inside Rhino, or software built for PPF such as PPF Engine, which runs on its own.
What 3D scanner do I need to make PPF patterns?
One that exports a mesh as STL, OBJ or PLY and holds small features such as sensor bezels and character lines. We use a Shining 3D Einstar Rockit, an entry-level handheld; anything in that class or better is a good starting point. Our scanner and plotter compatibility guide lists what we have tested ourselves.
Can I make PPF patterns without a plotter?
Yes, for small pieces. Print the pattern at full scale, lay it on the film on the bench and cut around it there, away from the paint. A cutter is faster and repeats a pattern exactly, which matters once a piece is bigger than a printer sheet or you cut it more than once.
How long does it take to make a custom PPF pattern?
It depends far more on the method and the panel than on anything else. On the scan route, the RAM 1500 fender flare in our case study took about three minutes of processing once the scan was clean. Scanning, cleanup, edits and the test fit are the rest of the job.
Should I make my own PPF patterns or keep a pattern subscription?
For most shops, both. A library is the fast answer for ordinary cars it covers well. Making your own pays off on the jobs it cannot help with: new models, rare and modified cars, aftermarket parts, unusual coverage and patterns that need correcting.
Workflow demo
Not ready yet? See it run on a panel like yours.
Tell us the vehicle or panel your pattern library does not cover, and what you scan and cut with. You see the real software run on a job like yours before you decide anything.
- 01You get a confirmation email straight away, so you know it arrived.
- 02A person replies within two working days (Estonia, Monday to Friday) with a demo on a comparable panel: a recorded walkthrough or a time for a live screen share.
- 03We tell you honestly whether your scanner, plotter and panel are a good fit today.
- 04No payment, no sales sequence. Your details are used for this demo only.